How To Store Food Without A Refrigerator (Explained)
When the power goes out, you have precious little time to find backup cooling methods for the food in your refrigerator (about 4 hours). Beyond that, or even before it, everything gets a bit dicey.
But what if you could plan so far ahead that you don’t really need your fridge in a long-term blackout? Like, what if the refrigerator wasn’t your only option for keeping perishables without them spoiling?
Well, that’s where the old-fashioned starts to look really good. From traditional canning and fermentation to smoking and drying, we’re talking food preservation methods that have been used for centuries, and are still popular among homesteaders and survivalists today.
If you want to get really serious about your food storage during a power outage, it’s time to step into the past.
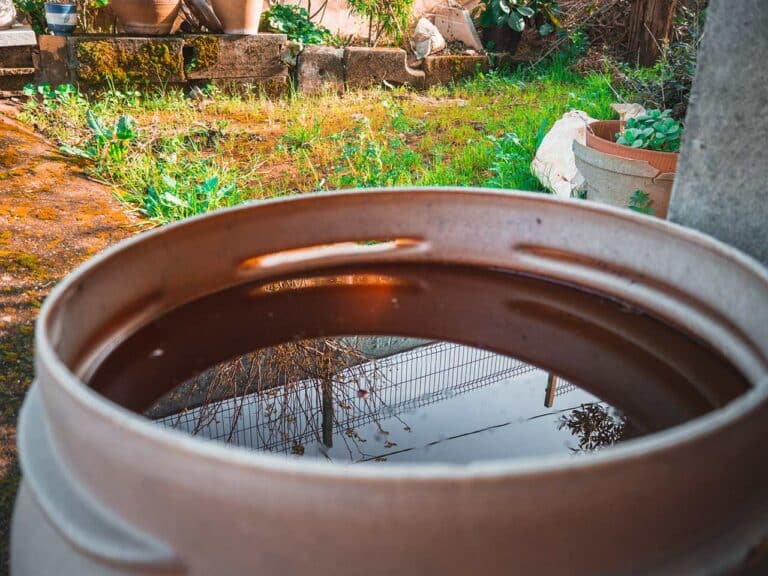
Using a Root Cellar
The tour de force that is the root cellar could be affectionately dubbed the “OG fridge.” Before the advent of modern refrigeration, root cellars served as the primary means to preserve perishables, thanks to the earth’s natural insulation properties. Positioned underground or against a hillside, these traditional storage spaces maintain a cool, consistent temperature year-round, making them perfect for storing vegetables, fruits, and other perishables.
During summer, a root cellar keeps produce cool, while in winter, it prevents items from freezing. It also effectively reduces moisture loss, minimizing spoilage, and ensuring a steady supply of fresh produce throughout the seasons.
When it comes to food storage, it’s about the most natural magic there is.
Selecting Suitable Foods
Root cellars are fantastic for keeping fruits and vegetables, especially root vegetables like potatoes, onions, apples, and cabbage, fresh.These are the items that will fare best inside of them.
Unfortunately, not all foods are as root cellar-friendly. Ethylene-producing fruits, such as apples and pears, can expedite the ripening and spoilage of other vegetables and fruits, so keep them far, far away.
On the flip-side, storing squash and pumpkins in a root cellar can lead to early rot due to their preference for slightly warmer storage temperatures.
Foods with strong odors, like onions and garlic, can influence the taste of neighboring produce, so those aren’t ideal either.
Perhaps the biggest bummer is that meat and dairy won’t hold up in a root cellar. This is due to several reasons:
- Temperature Fluctuations: Root cellars are designed to maintain a cool and constant temperature, but they don’t typically keep the consistently low temperatures required to safely store meat and dairy. Both meat and dairy need to be stored at or below 40°F (4°C) to inhibit the growth of harmful bacteria. Even slight temperature fluctuations in a root cellar can push these products into the “danger zone,” where bacteria grow most rapidly.
- Humidity Levels: Root cellars maintain high humidity, which is ideal for preventing certain vegetables from drying out. However, high humidity is not suitable for preserving meat or dairy. Meat, when cured and stored in conditions that are too humid, can develop mold or become rancid. Dairy products, especially cheese, can also mold quickly in high humidity.
- Sanitation and Cross-Contamination: Raw meats, especially, can harbor harmful bacteria, which can cross-contaminate other foods stored nearby. In the close quarters of a root cellar, this risk is amplified. Any leakage or drippage from meat can contaminate a large portion of stored produce.
- Pests and Rodents: Meat and dairy can attract pests and rodents more than vegetables. Storing these products in a root cellar can increase the risk of infestation, which is detrimental not only to the stored food but also to the integrity of the cellar itself.
- Limited Preservation: Even in optimal conditions, meat and dairy have a limited shelf life. In a root cellar environment, they will spoil more quickly than in a modern refrigerator or freezer.
But, don’t worry, when it comes to storing at least meat long-term, you do have some options.
Drying Foods at Home
Drying foods is a great way to preserve them without needing a refrigerator, and this method works well for many kinds of food, including fruits, vegetables, meat, fish, beans, grains, and nuts.
To dry food easily, the most important thing you’ll need is a food dehydrator. These handy gadgets help in evenly removing moisture from the foods while maintaining their nutritional content. If you don’t have a dehydrator, consider using an oven on a low setting or even drying some items, like herbs, in a well-ventilated area or outdoors.
For fruits and veggies, make sure to wash and slice them evenly to ensure they dry properly. You can soak fruit slices in a 50:50 mix of lemon juice and water to help prevent them from browning. Remove peels if you prefer, then dry the slices on a clean kitchen towel or paper towels to remove excess water before dehydrating.
When dehydrating meat or fish, it’d be best to slice them thinly and marinate them for added flavor, if desired. This also helps improve the final texture of the dried meat. Ensure that all excess moisture is removed before placing the slices in the dehydrator.
Beans and grains can be dried once they’re cooked. Just spread them out in a single layer on a tray and let them dry until they’re completely free of moisture.
Nuts can be soaked overnight in a solution of salt and water, then drained and spread in a single layer on dehydrator trays.
When dehydrating, remember drying times may vary depending on food’s thickness and moisture content, as well as the dehydrator or oven used. Once fully dehydrated, store dried foods with the rest of your stores, in an airtight container in a cool, dry place.
Canning and Pickling Foods
Canning Basics
Canning is another great way to preserve fruits and vegetables without a refrigerator. You’ll need some things, like glass jars, lids, and a pressure canner or water bath canner.
Water Bath Canning
Water bath canning is ideal for high-acid foods like fruits.
To water bath can, fill jars with your food and cover them with a hot liquid, like a syrup or brine. Seal the jars and water bath them in boiling water.
While the duration the jars need to be boiled in the water bath can vary significantly based on the specific food item, the altitude at which you’re canning, and the size of the jars, here are some rough guidelines for how long foods must be boiled in a water bath for proper canning:
- Jams and Jellies: 5 to 10 minutes for pint or half-pint jars
- Tomatoes (packed in water): 40 minutes for pint jars and 45 minutes for quart jars
- Fruit Juices (like apple or grape): 5 minutes for pint or quart jars
- Pickles: 10 to 15 minutes for pint jars
- Fruits (like peaches, pears, or apples): 20 to 25 minutes for pint jars and 25 to 30 minutes for quart jars
- Salsas: Around 15 minutes for pint jars
Pressure Canning
Pressure canning is essential for preserving low-acid foods, as these are at risk for the development of botulism when canned using other methods. The increased temperature achieved through pressure canning—typically 240°F (115°C) or higher—ensures the destruction of botulinum spores.
The exact duration in the pressure canner can vary based on the specific food, altitude, and size of jars, but here are some rough guidelines for how long foods must be put under pressure for pressure canning:
- Meats (like beef, poultry, or fish): 75 minutes for pint jars and 90 minutes for quart jars at 10-11 psi (pounds per square inch) for weighted gauge, 11 psi for dial gauge
- Green Beans: 20 minutes for pint jars and 25 minutes for quart jars at 10-11 psi for weighted gauge, 11 psi for dial gauge
- Carrots: 25 minutes for pint jars and 30 minutes for quart jars at 10-11 psi for weighted gauge, 11 psi for dial gauge
- Corn: 55 minutes for pint jars and 85 minutes for quart jars at 10-11 psi for weighted gauge, 11 psi for dial gauge
- Potatoes (sliced or cubed): 35 minutes for pint jars and 40 minutes for quart jars at 10-11 psi for weighted gauge, 11 psi for dial gauge
- Soups and Stews: Times can vary based on ingredients, but generally, 60 minutes for pint jars and 75 minutes for quart jars at 10-11 psi for weighted gauge, 11 psi for dial gauge
Just remember, no matter which method of canning you need to use for your food, how well you can something determines how safe it is to eat. Seasoned canners have already done all the trial and error, so consulting their recipes will keep you save.
Pickling Basics
Pickling is another method of preserving food without refrigeration. This process typically uses vinegar, salt, sugar, and various spices to create a tasty brine. Popular pickled items include cucumbers (pickles), peppers, and even fruits.
To start, prepare your vegetables or fruits by washing and cutting them into desired shapes. Sterilize your glass jars and prepare the pickling brine by boiling the vinegar, salt, sugar, and spices. Add the food to the jars and then pour the hot brine over the top, making sure to cover the items completely. Seal the jars and let them cool before storing them in a cool, dark place.
Fermenting Vegetables
Fermenting is a fantastic method to store foods without a refrigerator. Fermentation occurs when friendly bacteria break down sugar and starches, releasing lactic acid that preserves the food. Some popular fermented foods include sauerkraut (cabbage) and pickled eggplant.
To start with fermentation, you’ll need:
- Fresh vegetables: Choose high-quality, clean veggies.
- Salt: Use non-iodized salt for best results.
- Jars or containers: Glass jars work great and ensure proper sealing.
Once you have those things, simply cut your vegetables, mix them with salt to create brine, pack the veggies and brine into jars, ensuring no air pockets and that the veggies are fully submerged in the brine, then cover and store the jars at room temperature for a few days to a few weeks, depending on the vegetable and how much fermentation you like.
After fermentation, you can store your ferments at a cool temperature, such as in a root cellar.
Curing Meats and Fish
So, you’ve gotten your fruits and veggies squared away, now it’s time to deal with that meat. Curing is an age-old method to preserve meats and fish without refrigeration. It involves using a mixture of salt, sugar, and sometimes nitrates or nitrites to draw out moisture, slow bacterial growth, and enhance flavor. There are two ways to cure meats and fish: dry curing and wet curing (also known as brining).
Dry Curing Meat and Fish
Dry curing involves coating fresh cuts of meat or fish with a mixture of salt, sugar, and sometimes curing salts. The coated meat or fish is then placed on a rack, ensuring pieces don’t touch each other, and stored in a cool, dry, well-ventilated area. Depending on the specific desired product, the curing can take anywhere from a few days to several months.
Wet Curing Meat and Fish (Brining)
Wet curing involves immersing meat or fish in a brine solution made of water, salt, sugar, and sometimes curing salts. The meat or fish is then submerged in this solution, ensuring it’s fully covered, and stored in a cool environment. Depending on the specific recipe and desired product, the curing process can range from a few hours to several days, allowing the brine to penetrate and preserve the meat effectively.
The Timeless Art of Food Preservation
Throughout history, the need to store and preserve food has driven human innovation, giving rise to numerous methods that ensure our sustenance through various seasons and circumstances. Whether you’re a novice just exploring the world of food preservation or an expert fine-tuning your techniques, it’s a journey that connects us with our past and prepares us for the future. As we continue to develop and refine these methods, one thing remains clear: the art of food preservation is not just about prolonging shelf life — it’s about sustaining life itself, especially in unexpected circumstances that may change our entire way of life.