How To Connect A Ham Radio To A Power Supply (Expert Guide)
When it comes to connecting a ham radio to a power supply, it’s essential to know the basics. Whether you’re setting up a station at home or taking it on the go, a reliable power connection is key to seamless communication.
Setting up with your ham radio might seem a little tricky, but with some patience and guidance, you’ll have your station up and running in no time. The first step is understanding your equipment and its power requirements. So, let’s move forward and explore the essentials of establishing a solid power connection for your ham radio station.
Components Necessary for Connection
First things first in getting your ham radio connected to a power supply, you’ll need to gather the necessary components. You’ll need your transceiver, power supply, antenna, and some wiring equipment.
Receiver
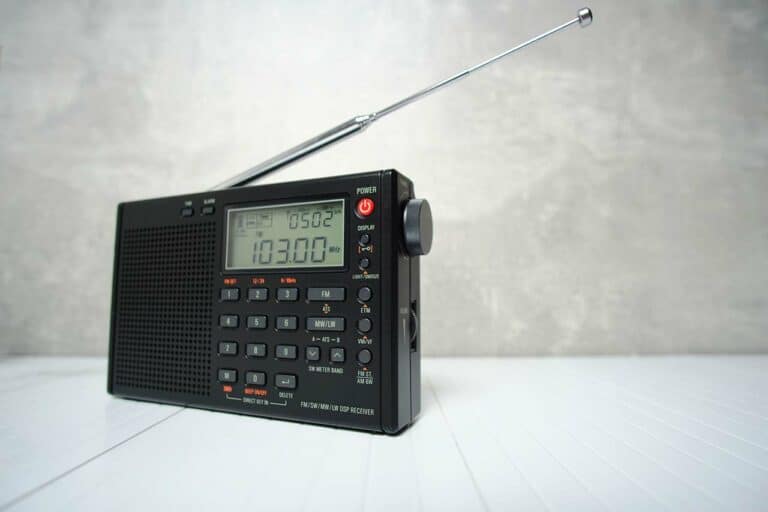
Your transceiver is the heart of your ham radio station. It’s a combination transmitter and receiver, handling both the transmission and reception of signals. So, ensure you’ve got a reliable one.
Power Supply
You’ll need DC power to power your ham radio, so you need a power supply that can efficiently convert your wall socket’s 120V AC into 12V DC. Make sure it can deliver enough current, especially if you’re running a 100-watt transceiver that might draw up to 20 amperes when transmitting.
Antenna
As for the antenna system, pick one that suits your needs and location. There’s a variety out there, so do your research before making a choice. The type of antenna you have affects your signal’s quality and range.
Wiring Supply
Finally, let’s talk wiring. Get the right wire gauge for connecting your transceiver to the power supply. A larger gauge might be better for longer wire runs or when operating at a higher current draw.
Here’s a quick rundown of the equipment you’ll need:
- Transceiver
- Power supply
- Antenna system
- Wiring (correct wire gauge)
- Terminal connectors, if required
- Solder, for solid connections. (If you’re not comfortable soldering, crimp connectors can do the trick.)
Identifying Types of Power
When setting up your ham radio, it’s essential to know the different types of power sources you can use. You have several options when it comes to powering up your radio station.
First up, let’s talk about voltage and current. Voltage is the difference in electric potential between two points, while current is the flow of electric charge. For most ham radios, you’re looking at a 12V DC (direct current) power source.
DC power is the go-to for many ham radio operators. It’s a steady and continuous flow of electric charge, usually supplied by a power supply that converts the AC (alternating current) from your home’s wall socket into 12V DC. AC power continuously changes direction and is what you’d find in your average household sockets.
A common option for getting that 12V DC is to use a power supply. These devices convert AC power from your wall socket to the suitable voltage and current for your radio. You’ll want a heavy-duty power supply that can provide enough current to operate your radio while transmitting – for a 100-watt transceiver, you may need about 20 amperes.
Solar power is another fantastic option, especially if you’re planning on using your ham radio off the grid or in emergency situations. Solar panels can convert sunlight into DC power, which you can then use to power your radio. Be mindful of the solar panel’s wattage rating, as it should be sufficient to support your radio’s power requirements. And, remember, solar power is only as dependable as the sun in your area.
So, when you’re connecting your ham radio to a power source, consider your environment, the available power supply options, and your specific radio’s voltage and current requirements. Knowing these things will help you make the best choice for powering your ham radio station.
Safety Measures in Handling Power Supplies
When it comes to choosing a power source for your ham radio, safety should be your top priority. One way to ensure your ham radio will operate safely is to choose a power supply with short-circuit protection or fuses. Fuses help prevent any nasty surprises if there’s an overload or a short. If you don’t have one on your power supply, you can add an external fuse for extra protection.
Now, let’s talk RF ground. RF ground helps suppress stray radio frequencies (RF) and keep electrical safety in check. So make sure your power supply is properly grounded. You can do this by connecting it to a dedicated grounding rod or an existing ground system (like a cold water pipe or buried radials). And don’t forget to use a thick, braided wire for the connection.
While you’re at it, keep an eye out for any sketchy wiring or loose connections. You don’t want any weak points in your setup. Make sure all wires and connections are securely fastened and insulated with electrical tape or heat shrink tubing.
Step-by-Step Guide to Wiring Your Ham Radio Properly
Wiring your ham radio to a power source is a straightforward task, but ensuring it’s done correctly and safely is crucial. Let’s break down the process:
1. Identify the terminals.
Locate the positive (“+”) and negative (“-”) terminals on both your ham radio and power supply.
2. Select the right wire gauge.
If your setup requires a longer run or a higher power setting, opt for a thicker wire gauge like 14 or 12 AWG.
For shorter distances, a thinner wire such as 18 AWG should suffice.
3. Cut and prep your wires.
Cut the wires to the needed length, ensuring you allow some extra length for potential adjustments.
Strip approximately 1/2 inch of insulation from both ends of each wire.
4. Connect the wires.
Attach the positive wire from your power supply to the positive terminal on your ham radio. Ensure it’s connected securely using suitable connectors like ring terminals or Powerpole connectors.
Similarly, connect the negative wire from your power supply to the negative terminal on your ham radio.
5. Ensure proper grounding.
Ensure your ham radio system is grounded to prevent electrical shocks and to protect your equipment from electrical surges.
6. Double-check your connections.
Before powering on, inspect all your connections. Make sure everything is tightened and secured correctly.
7. Power up the system.
First, turn on your power supply.
Then, power on your ham radio.
If wired correctly, the radio should start without any issues.
Safety Precautions
- Always ensure your workspace is dry to avoid electrical mishaps.
- Disconnect the power source when making connections or adjustments.
- Keep wires organized and away from foot traffic to avoid tripping or damage.
By following these steps and prioritizing safety, you’re setting yourself up for a successful and enjoyable ham radio experience.
Connection to Alternative Power Sources
Setting your ham radio up under everyday conditions is one thing, but, in a power outage, your most readily available power source won’t be there. Having backup power options, like solar panels and lithium batteries, can keep your radio running in emergencies.
Here’s a very brief rundown of how to set up your ham radio with these alternative power sources when the grid goes down:
Solar Power Setup for Ham Radio
1. Gather your components.
Solar panel(s)
Charge controller
Battery (preferably a high-energy density type)
2. Position your solar panel.
Choose a location with maximum sun exposure.
Ensure the panel is away from obstructions like trees or buildings.
3. Connect the solar panel to the charge controller.
The charge controller regulates the energy from the solar panel, preventing potential damage to the battery.
4. Connect the charge controller to your battery.
This allows the stored energy from the solar panel to charge your battery safely.
5. Power your ham radio.
Connect your ham radio to the battery, ensuring you have the correct connectors and that all connections are secure.
Lithium Battery Setup for Ham Radio
1. Choose the right battery.
Opt for lithium-ion or lithium-iron-phosphate (LiFePO4) due to their lightweight and high energy density characteristics.
2. Connect your battery.
Ensure your ham radio is turned off.
Attach the battery to your ham radio using the appropriate connectors.
3. Power the ham radio on.
4. Monitor battery levels.
While lithium batteries are efficient, it’s essential to monitor their energy levels and recharge them when necessary. Ham radios can take a lot of juice.
Maximizing Power Supply Efficiency
When it comes to powering your ham radio, efficiency is key. You want to get the most bang for your buck while minimizing any potential loss of power. Here are a few tips to help you maximize your power supply efficiency.
First, know your ham radio’s maximum current draw. This info can usually be found in the manual or spec sheet. Make sure you choose a power supply that can handle the load, especially during peak usage. If your power supply isn’t up to snuff, your radio’s performance will suffer.
Resistance can also play a major role in efficiency. The longer your power cables are, the more resistance they introduce. To minimize this issue, keep your cables as short as possible. Opt for bigger wire gauges, which offer less resistance than smaller ones. Additionally, choose good quality connectors to prevent unnecessary power loss.
Switch-mode power supplies (SMPS) are a popular choice when looking for efficient power supplies, as they tend to be more efficient than linear ones. However, they can introduce some RF interference. To mitigate this, ensure proper filtering and shielding for your ham radio setup.
At the same time, don’t forget to account for your operating environment. Different types of solar panels, for example, can have varying levels of efficiency based on your location and setup. Choosing the right panel to match your circumstances can go a long way toward maximizing your power supply efficiency.
Remember, an efficient power supply can help you get the most out of your ham radio setup. By minimizing resistance and choosing the appropriate components, you’re well on your way to an optimal experience and connection when you need it the most.